Disclaimer: This post contains affiliate links. If you purchase through these links, we may earn a small commission at no extra cost to you. All product recommendations are based on educational value and are chosen to genuinely help children learn. Thank you for supporting KidsWorksheetLab! 💛
How to Teach Your Child to Write Letters A-Z at Home
(Step-by-Step Guide + Free Worksheets)
📋 In This Article
- Step 1: Start with the Right Age & Readiness
- Step 2: Get the Right Supplies
- Step 3: Teach Pencil Grip First
- Step 4: Practice Pre-Writing Strokes
- Step 5: Teach Letters in the Right Order
- Step 6: Use Tracing Worksheets Daily
- Step 7: Make it Fun with Games & Activities
- Steps 8–10: Consistency, Praise & Review
- 12-Week A-Z Teaching Roadmap
- Frequently Asked Questions
Teaching your child to write the alphabet is one of the most exciting milestones in early childhood! As a parent, you have the power to make this journey fun, simple, and stress-free — right from home. This step-by-step guide will help your child confidently write all 26 letters from A to Z.
Whether your little one is just starting out or needs some extra practice, these proven steps — combined with free printable worksheets — will make the journey smooth and joyful. Also explore our free worksheet collection for more printable learning resources!
I created all the letter tracing worksheets on this site because I know how hard it is to find good, print-ready resources. Everything here is free, practical, and made with love for children and the parents who care for them. 💛
📌 Step 1: Start with the Right Age & Readiness
Most children are ready to start writing letters between ages 3.5 to 5 years. Look for these signs of readiness:
- Your child can hold a crayon or pencil with some control
- They show interest in drawing shapes and lines
- They can sit focused for at least 5–10 minutes
- They recognise some letters from books or environment
Don’t rush! A child who is not ready will get frustrated. Start with drawing and colouring activities first to build fine motor skills naturally.
🛒 Step 2: Get the Right Supplies
You don’t need to spend a lot! Here’s a simple list of what you need:
- Thick crayons or pencils — easier to grip for young children
- Letter tracing worksheets — free printables from KidsWorksheetLab.com!
- A flat, comfortable table — proper posture matters
- Erasers — encourage correction without frustration
- Star stickers for rewards — great motivation for kids!
✏️ Step 3: Teach Pencil Grip First
Before writing letters, your child must learn the correct “Tripod Grip”. This is the most important foundation for good handwriting:
Hold between thumb and index finger
The pencil should rest between the thumb and the index finger — not gripped with the whole fist.
Rest on the middle finger for support
The middle finger acts as a rest — this creates the classic tripod grip that reduces fatigue.
Keep the grip light — not too tight
A light grip allows smooth movement. A tight grip causes hand cramps and messy writing.
Pencil rests near the large knuckle
The pencil should rest at the base of the index finger near the large knuckle — not held at the very tip.
Use a triangular pencil grip tool (available at stationery shops) to help your child naturally hold the pencil correctly without constant reminders.
📝 Step 4: Practice Pre-Writing Strokes
Before jumping to letters, practice these basic strokes. Most letters are made from combinations of these shapes — mastering strokes first makes letter writing much easier!
- Horizontal lines ———
- Vertical lines |||
- Diagonal lines / \
- Circles and curves O C
- Zigzags \/\/
🔤 Step 5: Teach Letters in the Right Order
Don’t start from A straight to Z! Group letters by shape — it’s much more effective for young children. Teaching similar-shaped letters together builds muscle memory faster:
Group 1 — Straight Lines
Group 2 — Curves & Circles
Group 3 — Mixed Lines + Curves
Group 4 — Diagonal Letters
Teach uppercase letters first — they are generally easier for young children because of their clear, bold strokes. Once uppercase is mastered, move to lowercase!
📄 Download Free A-Z Tracing Worksheets!
Free printable letter tracing worksheets for every letter A to Z — no login, no sign-up needed. Print and start today!
✨ Download Free Worksheets →📄 Step 6: Use Tracing Worksheets Daily
Tracing is the best way for young children to learn letter formation. Here’s a simple daily routine that works beautifully for most children:
Print one letter tracing worksheet per day
Focus on just one letter at a time — consistency beats quantity!
Trace with a finger first
Let your child trace the letter with their finger before picking up a pencil. This builds the motor memory first.
Trace with a pencil following dotted lines
Then trace using the dotted guide lines — starting point arrows and numbered strokes make it easy to follow.
Write the letter independently 3–5 times
After tracing, ask your child to write the letter on their own — this is where the real learning happens!
Draw something starting with that letter
For the letter A, draw an apple. For B, draw a ball. Connecting letter to picture deepens the memory!
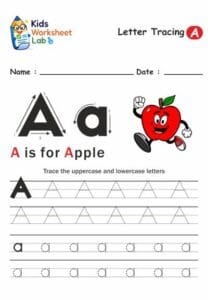
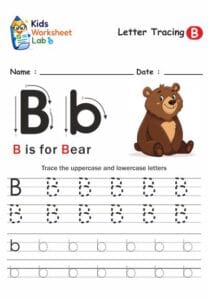
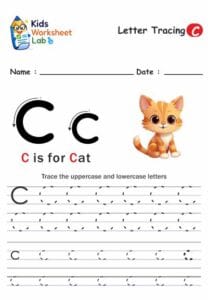
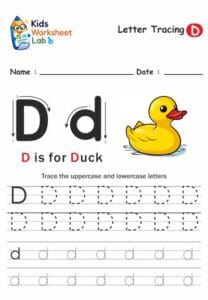
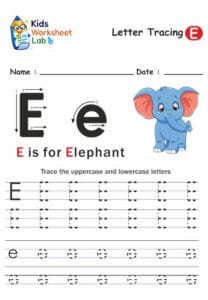
⬆️ Free A–E Letter Tracing Worksheets from KidsWorksheetLab — Download Free!
Visit kidsworksheetlab.com/practice-writing-letters — No sign-up needed! Also check our free Autism Resources for visual learning cards that pair beautifully with tracing practice.
🎮 Step 7: Make it Fun with Games & Activities
Kids learn best when they’re having fun! Here are some creative activities to reinforce letter writing beyond worksheets:
- Sand Writing: Fill a tray with sand — let your child write letters with their finger
- Chalk Writing: Write giant letters on the driveway with chalk
- Play-Doh Letters: Shape letters using Play-Doh for a tactile experience
- Letter Hunt: Find letters in books, signs, and packaging around the house
- Alphabet Songs: Sing the ABC song while tracing each letter
- Dot-to-Dot Worksheets: Available free at KidsWorksheetLab.com!
Multi-sensory learning — writing in sand, tracing on rough textures, and forming letters with clay — builds stronger motor memory than paper-only practice. Mix it up for best results!
⏰ Steps 8–10: Consistency, Praise & Review
Step 8: Keep Sessions Short & Consistent
Young children have short attention spans. Follow these daily time guidelines:
- Age 3–4: 5–10 minutes per day
- Age 4–5: 10–15 minutes per day
- Age 5–6: 15–20 minutes per day
Consistency is more important than duration. 10 minutes every day is far better than 1 hour once a week!
Step 9: Celebrate Progress, Not Perfection
- Praise effort, not just the result — “You tried so hard!” works best
- Create a progress chart with star stickers for each letter mastered
- Never compare your child to other children
- Celebrate milestones — after every 5 letters, do something special
Step 10: Review and Revise Regularly
- Do a weekly “Letter Review” — mix up letters already learned
- Use missing letter worksheets to test knowledge
- Try writing simple 3-letter words (cat, bat, hat)
- Read alphabet books together every night
🌈 More Free Learning Resources!
Explore our complete worksheet collection — letter tracing, missing letters, find the letters, and more. All completely free!
✨ Browse All Free Worksheets →📋 12-Week A-Z Teaching Roadmap
Here’s a simple week-by-week plan to help you stay on track from pre-writing strokes all the way to full A-Z mastery:
| Week | Focus |
|---|---|
| Week 1–2 | Pre-writing strokes, pencil grip & letter recognition games |
| Week 3–4 | Group 1 letters (L, I, T, E, F, H) with tracing worksheets |
| Week 5–6 | Group 2 letters (O, C, G, Q, S) with fun activities |
| Week 7–8 | Group 3 letters (B, D, P, R, U, J) and daily revision |
| Week 9–10 | Group 4 letters (A, K, M, N, V, W, X, Y, Z) |
| Week 11–12 | Full A-Z review, lowercase letters & simple words |
❓ Frequently Asked Questions
At what age should a child start writing letters?
What is the correct order to teach letters to kids?
How long should letter writing practice be each day?
Are free printable letter tracing worksheets effective?
Should I teach uppercase or lowercase letters first?
🌟 Final Thoughts
Teaching your child to write letters at home is a beautiful journey. With patience, consistency, and a little creativity, your child will be writing A to Z with confidence before you know it!
Remember — every child learns at their own pace. The most important thing is to make learning a joyful experience. Keep it fun, keep it simple, and enjoy every moment of watching your little one grow! 💛
👉 Practice Writing Letters Worksheets A-Z — Free & Printable
👉 Find the Letters Worksheets A-Z — Free & Printable
👉 Missing Letters Worksheets — Free & Printable
👉 Free Autism Resources — Visual Schedules, Charts & PDFs
👉 Worksheet Generator — Custom Worksheets for Kids
🚀 Ready to Start Teaching Letters?
Download your free A-Z Letter Tracing Worksheets now — no login, no sign-up, completely free. Print and start today!
✨ Download Free Worksheets Now →Kya yeh guide aapke kaam aayi? Neeche comment mein zaroor batayein:
- 👉 Aapke bachche ko letters likhna seekhne mein sabse badi challenge kya hai?
- 👉 Kaunsa step ya activity aapko sabse useful lagi?
- 👉 Koi aur resource chahiye jo hum bana sakte hain?
Aapka ek comment hume aur better content banane mein help karta hai! 💛
Disclaimer: This post contains affiliate links. If you purchase through these links, we may earn a small commission at no extra cost to you. All product recommendations are based on educational value and are chosen to genuinely help children learn. Thank you for supporting KidsWorksheetLab! 💛